Creating a test site on a local computer
It is considered a good practice to do all development work on a separate test site before making changes to a production site. A test site allows you to evaluate the impact of upgrades, new modules, modifications to themes etc. without causing disruption to your live site. For information about setting up a web server on a local computer, see the Local Server Setup section of the Developing for Drupal guide.
- Download Drupal.
Drupal files, and associated modules, are compressed in the
.tar.gzformat and can be extracted using most compression tools.On a typical Unix command line, use:
wget http://drupal.org/files/projects/drupal-x.x.tar.gztar -zxvpf drupal-x.x.tar.gzThis will create a new directory drupal-x.x/ containing all Drupal files and directories and will preserve all of Drupal's file and directory permissions. Move the contents of that directory into a directory within your web server's document root or your public HTML directory.
mv drupal-x.x/* drupal-x.x/.htaccess /var/www/htmlThe base URL for your Drupal installation will be set in your Web server's configuration file. You will need to know this URL before proceeding to the next step of the installation. If you are installing Drupal on your local machine the base URL may be: http://localhost. If you are installing Drupal onto a Web server your base URL may be a specific domain name (such as http://example.com).
Note for Windows users
A number of compression programs, such as 7-Zip, allow you to extract.tar.gzfiles. To use 7-Zip, right-click on the .tar.gz file and, in the menu that appears, select 7-Zip -> Extract Here. A .tar file will appear. Right-click on the .tar file and again select 7-Zip -> Extract Here. In a few moments, the final Drupal folder will appear. - Grant write permissions on the configuration file
Your Drupal download comes with a default configuration file at
drupal/sites/default/default.settings.phpwhich needs to be prepared so that the installer can edit it.- Copy the
default.settings.phptosettings.php. You can do this from the command line usingcp default.settings.php settings.php.
NOTE: Do not simply rename the file. The Drupal installer will need both files. - You should now have both a default.settings.php and settings.php file in your
drupal/sites/defaultdirectory. - Make the settings file writeable, so that the installer can edit it
chmod a+w sites/default/settings.php
orchmod 666 sites/default/settings.php
Both commands have the same effect.
Several FTP tools like Filezilla, Transmit, and Fetch allow you to change file permissions, using a 'file attribute' or 'get info' command. In this case the octal or numeric value file permission should be set to 666. - Drupal should set the file permissions back to read-only once the installation is done. You should make sure this is the case and manually change it yourself if it didn't happen. You can use the same command, slightly modified, to remove write permission:
chmod a-w sites/default/settings.php
orchmod 555 sites/default/settings.php.
If you are using a FTP tool the permission should be set to 555.
- Copy the
- Windows note
On a Windows system this would be Change permission and make sure the file is not marked Read Only before running the installer and then set it back to Read Only after. For more information about modifying Windows file permissions, see the Troubleshooting FAQ Create database
Create database with MySQL
This step is only necessary if you don't already have a database set-up
(e.g. By your host). In the following examples, 'username' is an example MySQL user which has the CREATE and GRANT privileges. Use the appropriate user name for your system.First, you must create a new database for your Drupal site here, 'databasename' is the name of the new database):
mysqladmin -u username -p create databasename
Next you must login and set the access database rights:
mysql -u username -p
You will be asked for the 'username' database password. At the MySQL prompt, enter following command:
GRANT SELECT, INSERT, UPDATE, DELETE, CREATE, DROP, INDEX, ALTER ON databasename.* TO 'username'@'localhost' IDENTIFIED BY 'password';
where
'databasename' is the name of your database 'username@localhost' is the username of your MySQL account 'password' is the password required for that username FLUSH PRIVILEGES;
the database should be created with UTF-8 (Unicode) encoding
- Run The Installation Script
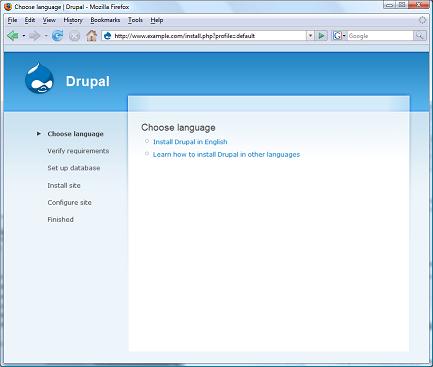
To run the install script point your browser to the base URL of your website.
The base URL is defined in your Web server configuration file and is specific to the document root where you placed your Drupal files. If you have installed Drupal on your desktop machine this URL might be http://localhost.

You will be guided through several screens to set up the database, create tables,

add the first user account and provide basic web site settings.

1 comments:
Great information about drupal 7 tutorial. This information more helpful for me.
drupal
Post a Comment